Make your own DIY Mexican papel picado wall hanging with stencils. Discover tools, step-by-step instructions, and recommended craft products for a colorful, renter-friendly decor project.
Table of Contents
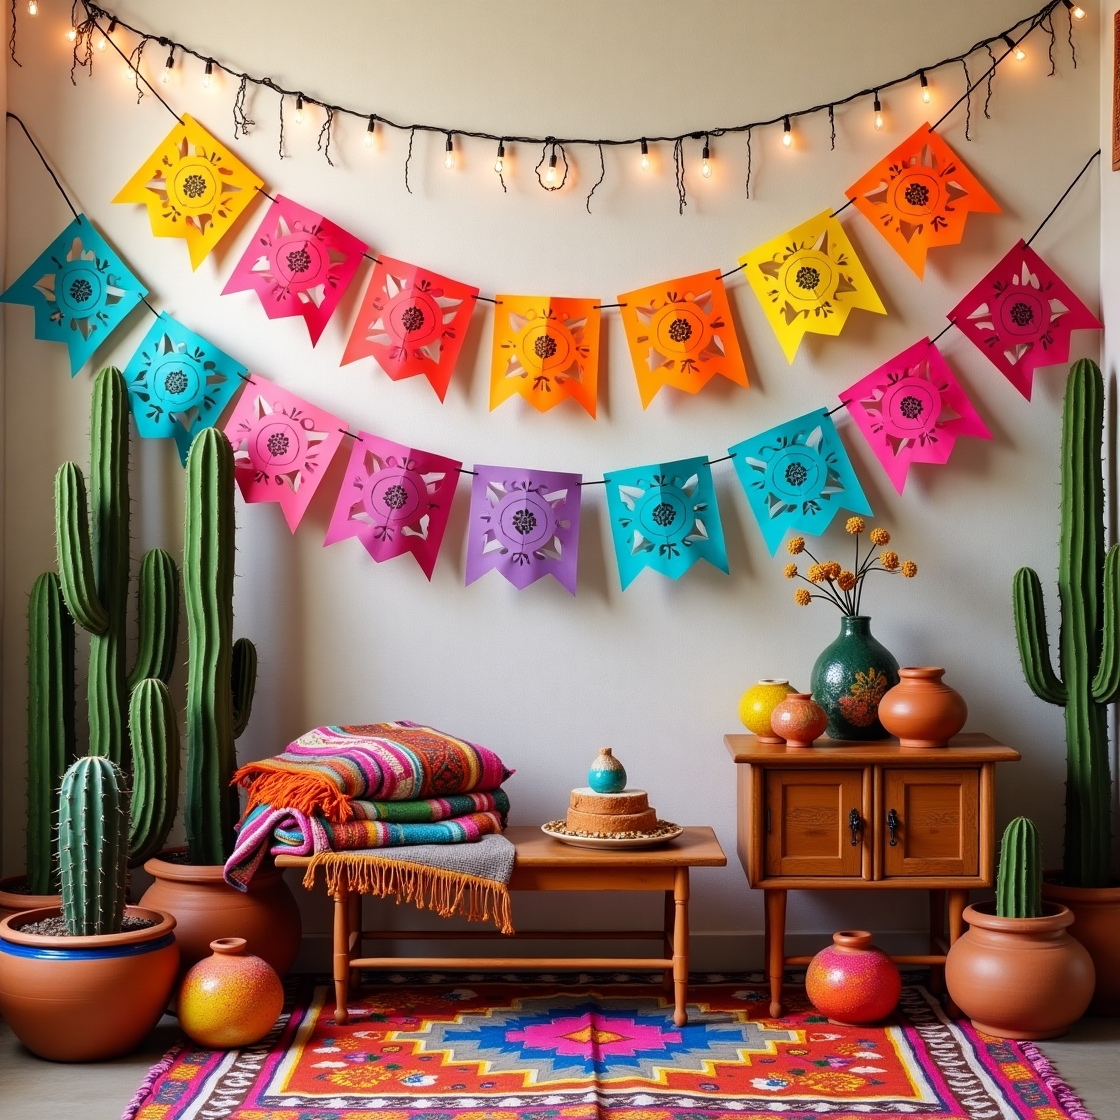
What Is Papel Picado?
Papel picado, or “perforated paper,” is one of Mexico’s most vibrant and culturally meaningful folk arts. These colorful paper banners, cut with intricate patterns, are commonly displayed during celebrations like Día de los Muertos, Cinco de Mayo, weddings, and national holidays.
Traditionally, they’re made from tissue paper or thin plastic, showcasing everything from florals and birds to skulls and geometric motifs.
According to Mexico’s Ministry of Culture, papel picado has pre-Hispanic roots and became a popular decorative element in colonial religious festivals, blending native and European art forms.
Why Make a DIY Mexican Papel Picado Wall Hanging?
Whether you’re planning a fiesta or looking for a unique way to decorate your home, a DIY Mexican papel picado wall hanging is the perfect low-cost, high-impact solution. Here’s why:
- Budget-friendly: All materials are affordable and easily sourced.
- Customizable: Choose your own colors, shapes, and patterns.
- Temporary or permanent: Great for seasonal decor or long-term wall art.
- Cultural connection: Celebrate Mexican heritage in a creative, hands-on way.
- Product monetization: Ideal for linking to craft tools and stencils for affiliate marketing.
Essential Supplies (With Affiliate Product Recommendations)
| Item | Use Case | Shop Now (Affiliate Links) |
|---|---|---|
| Tissue paper (colorful) | Base material for banners | Amazon Tissue Paper Variety Pack |
| Stencil kits (Talavera & folk art) | Pattern creation | Etsy Papel Picado Stencil Set |
| Craft knife/X-ACTO knife | Precision cutting | X-ACTO Precision Knife Set |
| Cutting mat | Protects surfaces during stencil cutting | Fiskars Self Healing Cutting Mat |
| Twine or string | Hanging the papel picado | Natural Jute Twine Roll |
| Glue stick or washi tape | Assembly and wall-safe adhesion | Elmer’s CraftBond Glue Stick |
| Scissors & ruler | Measuring and trimming | Westcott Stainless Steel Scissors |
Step-by-Step: DIY Mexican Papel Picado Wall Hanging
Step 1: Choose Your Color Palette
Traditional papel picado features vibrant shades like:
- Magenta
- Yellow
- Cobalt blue
- Orange
- Green
Select 4–6 bold hues for a visually balanced piece. Stick to bright colors for authenticity, or customize based on your event’s color scheme.
Step 2: Prepare and Cut Your Paper
Cut tissue paper into rectangles—commonly 8″x10″ or 10″x14″.
Pro Tip: Stack up to 5 sheets and fold them in half to create symmetrical patterns (just like making paper snowflakes).
Step 3: Stencil Your Design
If freehand cutting isn’t your thing, use a stencil kit with traditional Mexican motifs.
- Secure the stencil to your paper with washi tape
- Use a sharp craft knife and light pressure to follow the cut lines
- Remove the stencil gently and let the design breathe
🔗 Get yours here: Papel Picado Stencil Set – Etsy
Step 4: Assemble the Banner
Use a glue stick to fold the top of each paper over your twine or string. Space each paper evenly, about 2 inches apart. You can also tape the paper to the string if glue isn’t your thing.
Hang it across your wall using adhesive hooks or wall-safe tape.
Creative Variations for Every Occasion
Here’s how to adapt your papel picado for different themes:
| Occasion | Design Themes | Colors |
|---|---|---|
| Día de los Muertos | Skulls, marigolds, crosses | Purple, orange, black |
| Weddings | Hearts, doves, lace patterns | White, pastel pink, gold |
| Fiestas | Suns, sombreros, guitars | Red, green, yellow |
| Birthday Parties | Balloons, names, animals | Any bright festive mix |
Use stencils to personalize your banners—name initials, dates, or custom messages.
Tips for a Professional Finish
- Use sharp blades and change them regularly for clean cuts.
- Work on a flat, well-lit surface to prevent errors.
- Iron tissue paper on low heat if it’s wrinkled (place between two cloths).
- Use plastic sheets instead of paper for outdoor or reusable versions.
- Mount finished banners in shadow boxes for permanent wall art.
FAQs about DIY Mexican Papel Picado Wall Hanging
Can kids do this project?
Yes, but avoid craft knives. Supervise younger kids and use safety scissors for simple shapes.
How long does it take?
For a standard wall banner (10–12 panels), expect 1–2 hours from prep to hanging.
How do I store unused or seasonal papel picado?
Keep flat in an envelope or poster folder. Tissue paper wrinkles easily, so avoid stacking heavy items on top.
Is this eco-friendly?
Yes! Use recyclable tissue paper or biodegradable string. You can also repurpose old wrapping paper or newspaper.
Conclusion: Celebrate Colorfully, Craft Thoughtfully
Making a DIY Mexican papel picado wall hanging is more than just an art project—it’s an experience in culture, community, and celebration. Whether you’re honoring your roots, throwing a themed party, or simply adding vibrance to your home, this beautiful craft offers connection and creativity at its core.
Ready to create your masterpiece?
🎨 Start with this stencil kit: Shop on Etsy
🛒 Grab the essentials on Amazon: Craft Tools Bundle